UAE Shops - Established in 2002
عربى
Microcontroller based Water Level Controller cum Motor Protector
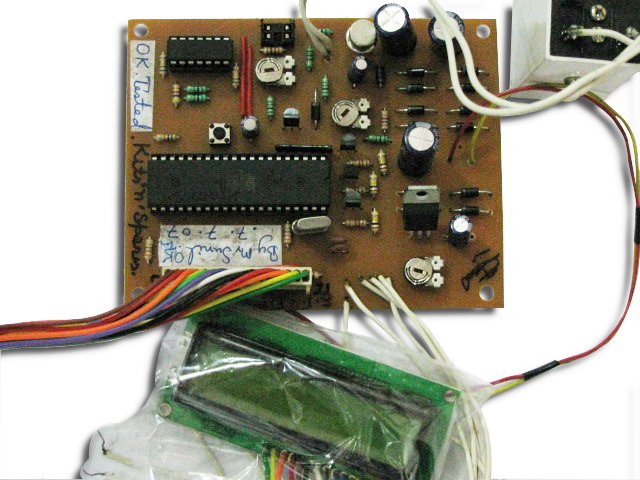
The Microcontroller based Water Level Controller cum Motor Protector controls ‘on’ and ‘off’ conditions of the motor depending upon the level of water in the over head tank (OHT), the status of which is displayed on an LCD module. The circuit also protects the motor from high voltages, low voltages, fluctuations of mains power and dry running. The circuit of the Microcontroller based Water Level Controller cum Motor Protector comprises of the operational amplifier LM324, microcontroller AT89C51, optocoupler PC817, regulator 7805 and an LCD module. Port pins P2.0 through P2.2 of the AT89C51 (IC2) are used to sense the water level, while pins P2.3 and P2.4 are used to sense the under-voltage and over-voltage, respectively. Pin P3.4 is used to control relay RL1 with the help of optocoupler IC3 and transistor T5 in the case of under-voltage, over-voltage and different water-level conditions. The LM324 (IC1) is a quad operational amplifier (op-amp). Two of its op-amps are used as comparators to detect under- and over-voltage. In normal condition, output pin 7 of IC1 is low, making pin P2.3 of IC2 high. When the voltage at pin 6 of N1 goes below the set reference voltage at pin 5 (say, 170 volts), output pin 7 of N1 goes high. This high output makes pin P2.3 of IC2 low, which is sensed by the microcontroller and the LCD module shows ‘low voltage.’ In normal condition, pin 1 of N2 is high. When the voltage at pin 2 of N2 goes above the set voltage at pin 3, output pin 1 of N2 goes low. This low signal is sensed by the microcontroller and the LCD module shows ‘high voltage.’ Presets VR1 and VR2 are used for calibrating the circuit for under- and over-voltage, respectively. When water in the tank rises to come in contact with the sensor, the base of transistor BC548 goes high. This high signal drives transistor BC548 into saturation and its collector goes low. The low signal is sensed by port pins of microcontroller IC2 to detect empty tank, dry sump and full tank, respectively. When water in the tank is below sensor A, the motor will switch on to fill water in the tank. The LCD module will show ‘motor on.’ The controller is programmed for a 10-minute time interval to check the dry-run condition of the motor. If water reaches sensor B within 10 minutes, the microcontroller comes out of the dry-run condition and allows the motor to keep pushing water in the tank. The motor will remain ‘on’ until water reaches sensor C. Then it will stop automatically and the microcontroller will go into the standby mode. The LCD module will show ‘tank full’ followed by ‘standby mode’ after a few seconds. The ‘standby mode’ message is displayed until water in the tank goes below sensor A. In case water does not reach sensor B within 10 minutes, the microcontroller will go into the dry-running mode and stop the motor for 5 minutes, allowing it to cool down. The LCD module will show ‘dry-sump1.’ After five minutes, the microcontroller will again switch on the motor for 10 minutes and check the status at sensor B. If water is still below sensor B, it will go into the dry-running mode and the LCD module will show ‘dry-sump2.’ The same procedure will repeat, and if the dry-run condition still persists, the display will show ‘dry-sump3’ and the microcontroller will not start the motor automatically. Now you have to check the line for water and manually reset the microcontroller to start operation. In the whole procedure, the microcontroller checks for high and low voltages. For example, when the voltage is high, it will scan for about two seconds to check whether it is a fluctuation. If the voltage remains high after two seconds, the microcontroller will halt running of the motor. Now it will wait for the voltage to settle down. After the voltage becomes normal, it will still check for 90 seconds whether the voltage is normal or not. After normal condition, it will go in the standby mode and start the aforementioned procedure. Learning: Programming and practical control application of the microcontroller AT89C51. Application of the operational amplifier IC LM324 and opto-coupler PC817. Application of the 3-terminal voltage regulator IC 7805. Interfacing an LCD module to the micro-controller output.


